This year, I was blessed with an abundance of beautiful cards: some painted or drawn; others hand made or coloured and more still that were delightful commercial ones. All were thoughtful and reflected the things I love. I kept them up for as long as was respectable (two weeks), admired them once more as I took them down and reread the messages, but still was sad to throw away such pleasing miniature art works.
From card to coaster
Which was when I got my brain in gear to think of how I could reuse them in some practical way. If I could work out some use for them, I could continue to enjoy them throughout the year. Wiping down my rather old and tatty drinks coasters gave me the first bolt of inspiration. What if I could cut out the required shapes, glue them onto the old card and make new coasters. Would that work? It was worth a try. After all, the joy of working with paper is that if it fails, it simply goes into the recycling bin and nothing but your time is lost.
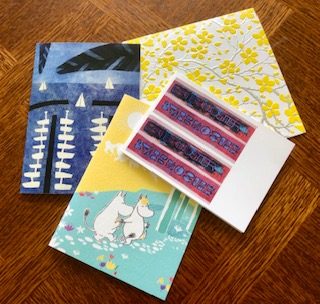
I made my first selection on the basis of beauty, colour coordination and image size. A coaster with Happy Birthday scrolled across it was unlikely to look very professional! One, a print of an artist friend’s work, didn’t quite work for the coaster size, so I selected another, joyful and quirky one.
If there were any skill involved in all of this, it only lay in selecting the right part of the card to cut and use on the mat. With a little twiddling, it was quite easy and if you were really intelligent (unlike me who has only just thought of it) you could cut out a tracing paper template so that you would know exactly what the image would look like rather then just eye-balling it.
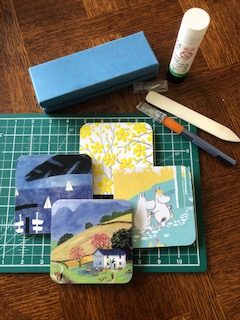
The mats were placed face down on the back of the cards and I used a scalpel to cut out the squares as close to the mats as possible. I used a regular glue to attach them and a bone folder to ensure that they were absolutely flat. All that was needed next was several coats of good craft varnish and voila! New mats and happy reminders of my friends. They are surprisingly sturdy and now my husband is suggesting I redo the place mats. I’m thinking book covers might be fun…
The reimagined birthday card
Since a lovely friend’s birthday was coming up, I also needed to make a card for her. Could I recycle a card I had received in an imaginative way? One of my birthday gifts had been a fantastic paper cutting book and that gave me an idea. Using a very pretty floral card, I could make a backdrop for my paper butterflies. By layering the elements, it would give a 3D effect and I am rather partial to 3D.
Having carefully cut out the base of the card for the floral scene, I used chalk to colour the background, glued on the base and decorated with butterflies. For a June birthday, it seemed the perfect format for my greeting. ‘May your day be filled with sunshine and butterflies, friendship and flowers.’
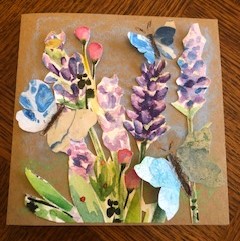
It is far from perfect, of course, but I hope my friend will forgive its failings and enjoy the sentiment behind it.
Birthday wishes to bookmarks
My husband is a terror with bookmarks. I sometimes wonder if he eats them. No sooner have I given him one for the book we are reading than it is gone, only to be replaced with a blade of grass or an old receipt. My cards gave me the opportunity to fix that problem. I would make a plethora of pretty bookmarks, leave them in a pile on the coffee table and never again would we have to search for the page we left off.
Aesthetics are all, so rather than just cutting strips of card and leaving it at that, I used my corner cutter to give them a more finished look and added complementary coloured ribbons (recycled of course!) to add a little flair. It took only minutes, but gave the results I was hoping for. This tiny project is a great way to use any greeting card and makes a pretty touch to a book you are giving as a gift. If you are able to coordinate the bookmark with the book – even better. Just make a pile of them!
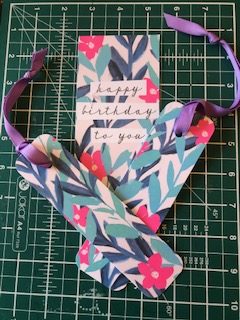
The equipment needed for this project is again very simple. I use a scalpel and cutting mat, but if you have a steady hand, scissors will do fine. Again, I used my corner cutter to neaten the edges and took my bookmarks from the margin of the card and recycled the birthday wishes part. If you don’t have a single hole punch, stick your ribbon to the back or leave plain.
Passing on greetings
Good things should always be passed on in my view, so I decided that those cards which were suitable in size and design should be made into postcards for little messages. Sometimes, you just don’t have that much to say, so a postcard is the perfect solution.
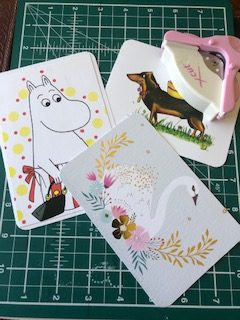
This idea is slightly modified from one I found in another paper art book. The author there used paperback covers (also good) and I used my cards. Once again, my corner cutter made itself useful. On the plain side, draw a few lines for the address and if you wish write, ‘postcard’ on the perpendicular. Royal Mail will post anything (I once had a friend who posted his girlfriend a banana skin and it got there.) Other countries might be more particular.
Once you begin seeing how to repurpose cards and paper, there really is no end to it. My new paper cutting adventure has just begun and already I am hooked. Other projects are in the pipeline, but for now, I think I’m going outside to enjoy the sunshine and be inspired by nature.
