Be More Womble!

As a child growing up in the ’70s, I was treated to a number of slightly trippy television programmes: The Goodies, The Magic Roundabout, and The Banana Splits, but my favourite was The Wombles. Perhaps it sparked my early interest in protecting the environment, and I still remember most of the theme tune today.

It begins:

Underground, overground, Wombling free
The Wombles of Wimbledon Common are we
Making good use of the things that we find
Things that the everyday folks leave behind.

By Screenshot captured by Nevetsjc from The Wombles,Series 2, Episode 6 – “Orinoco’s Midnight Feast”, Original work and models made by Elizabeth Beresford, Fair use, https://en.wikipedia.org/w/index.php?curid=24673406

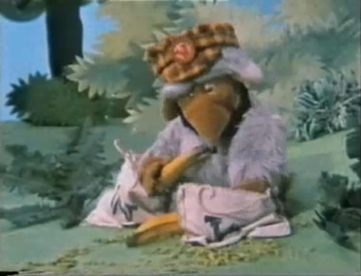
These adorable furry animals, created by Elizabeth Beresford, encouraged us both to avoid littering and to use ‘the things that everyday folks leave behind’ wisely.

Whilst I am an advocate for not littering and picking up rubbish left on the beach, etc, my take on the Wombles here is in up-cycling what might otherwise be thrown away.
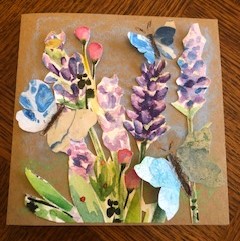
Womble art

As you have probably noticed, I am rather obsessed with art and crafts. The only downside is that materials are rather expensive. Let me into an art or hobby store and I struggle to restrain myself. However, what if I made myself the challenge of using only – or predominantly – used and recycled materials?

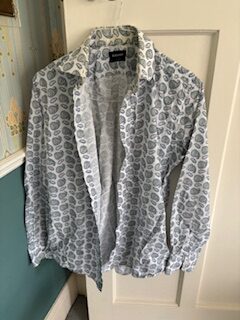
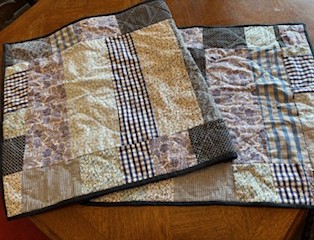
Our rather excessive materialism pains me (and the planet) but I certainly don’t want to be an ascetic. Perhaps I can have my cake and eat it too with a little imagination? Whilst decluttering, my husband and I ejected a few t-shirts that were not worthy for the charity shop but not quite ready for use as rags.

There is quite a lot of fabric in a t-shirt and cut into strips (a very Zen activity), it makes a kind of yarn.

A sunny day activity Image: Karen Costello-McFeat

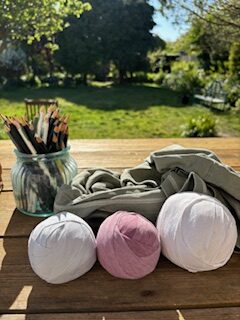
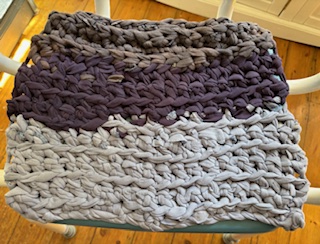
With the aid of my jumbo crochet hook, I was able to sew them back together to make some seat cushions and when I’ve done those and mastered circular crochet, I shall use others to make a pretty rag rug.

Here’s one that I prepared earlier! Image: Karen Costello-McFeat

Paper recycling

Of course, the one material that we all have an abundance of is paper. Though paper recycling is great for the environment, reusing that paper and card is even better. I confess that I am dreadful hoarder of pretty papers, sturdy card and boxes. Though they may not be used straight away, they will usually be found a use for eventually.

The only downside to such a habit is storage. When my craft room reached an appalling state yesterday, I decided to do yet another organisation and felt that a shallow tray, like a cutlery drawer, would be most useful. I stored the thought away for when I next went to a charity shop, until my eyes fell upon a large, sturdy and shallow box. Hmmm, I mused. Would that do?

Free storage! Image: Karen Costello-McFeat

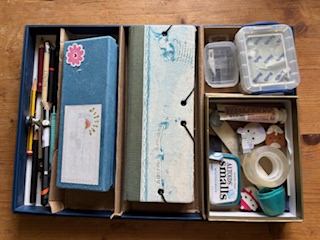
It most certainly did. Bending some strong corrugated card to the correct height and adding a small box meant that I had the bespoke storage that I needed. There is now room on my craft table for making crafts.

Gifts with heart

With all the benefits of mass production, it has one downside. There is nothing individual about it. No matter how beautifully designed or made, it is one of thousands. Yet, if we choose to make our own gifts, we give our labour with love and create them to fit the loves of the recipient.

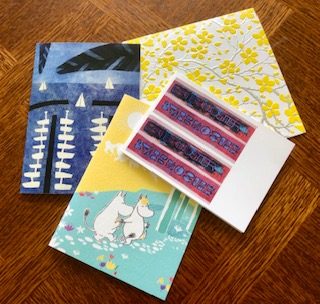
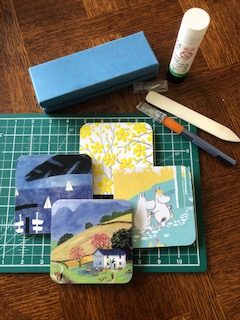
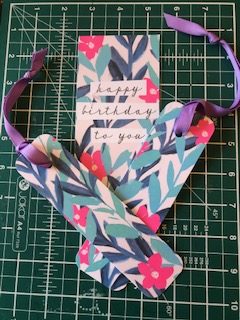
The last week or so, I have been looking into book binding and as always enjoy playing with cards and papers for junk journals. Here are a few things that I’ve made.

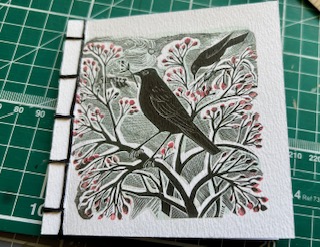
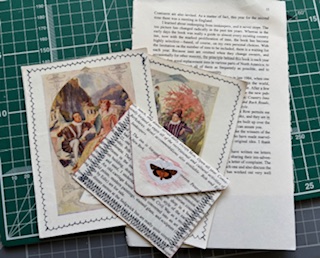
A greetings card is turned into a notebook using a Japanese binding technique; wallpaper samples become sketchbooks and envelopes; old book pages create pretty filler pages for a journal and envelopes for thank you messages.

Sourcing materials

If you are more ambitious and want to try some new crafts, I find that charity shops are filled with projects others have neither started nor completed. You may even be lucky enough to have a ‘Scrap Store’, as we have, that sells and receives all sorts of wonderful craft goods from fabric to wool and offers classes to boot.

The restrictions imposed on you by using your own or others’ recycled materials are not arduous. For me, it is rather like the strictures of form when writing poetry – the challenges posed therein make it even more enjoyable.

Release your inner Womble

Though the characters of the Wombles are now rather outdated, their message could not be more current. If we take our cue from them to reuse and remake imaginatively, the world will definitely be a kinder, tidier and happier place.

There’s life in the old shirt yet…

This week’s post will be shorter than usual (collective sigh of relief) as next week we are going to Oregon to meet up with all my family. I’m dreading the journey, which will be evil, but longing for our reunion. I only hope that my children and granddaughter have waterproofed themselves for the abundance of kisses coming their way. But back to the topic in hand.

Compulsively creative

Whilst playing in my craft room the other day, I realised that I am now compulsively creative. If I’m not writing, baking or making something, I’m miserable. As addictions go, this is a good one, though it is potentially rather expensive. Luckily for me, I’m drawn to those activities which maximise using what we have rather than buying new materials. Though it definitely adds extra challenges, it has the wonderful advantage of freeing your creativity. Much of what I use would normally be thrown out, so if it goes awry, there is no loss. If it goes to plan, however, I can be doubly pleased.

A delightful design!
Image: Karen Costello-McFeat

My husband always goes to work immaculately dressed and has a greater variety of shirts than Gatsby. In the same way that most of us go through socks, my husband goes through shirts. As these are very expensive, he often sources them new or almost new from charity shops.

The fabric used in making these shirts is excellent: high thread count quality cotton. Alas, though the fabric will last a long time, collars and cuffs quickly deteriorate. Which is where I come in. My sewing skills are not of the highest, so using this gorgeous fabric allows me to practice.

Starting simple

I think it was a friend who told me that the easiest way to make a cushion was with a shirt – the row of buttons at the front would provide the opening for the pad and all you have to do is sew the sides. So I made a set and when they wore out (they are now dusters), I made some more.

Perfect for beginners Image: Karen Costello-McFeat

I have to confess, it isn’t always as straight forward. Some shirts will have darts that need to be unpicked first; the buttons need to be centred on the front and fabric has a tendency to squiggle about – even when pinned. That said, these cute little cushions cost me nothing.

A greater challenge

With cushions galore and mountains of deconstructed shirts in my craft dresser, I thought I would try something a little more challenging. Over the past years, I have made a few quilts. My friend Jane was an invaluable help at teaching me, but now it was time to try without supervision.

My shirt pieces, unlike commercial quilting quarters, were of a variety of sizes. The longest was from the back and I thought that with a number of these I could easily make a bed runner. So I dutifully cut out a quantity of strips that together would make the length I wanted and sewed them all together. Alas, my shirt sections were not quite long enough – so I needed a border too! More sewing of strips together and cutting to size.

Quilting lesson and bed runner in one
Image: Karen Costlello-McFeat

Finally, I had the shape and length I needed. Sandwiching my wadding between my patchwork and a piece of old sheet, I only needed some bias binding to make it neat and then I could begin on the quilting.

Part of the reason that I love quilting is that the stitching part is wonderfully simple and meditative. My craft club is usually far too exuberant to be able to concentrate on anything intricate – but sewing a quilt – perfect!

Making it unique

Quilts are gorgeous for all sorts of reasons, but what appeals to me most is the number of ways you can make them your own. Even if you choose a formal design, the fabrics you use and the colours you combine are unique to you. My design was neither formal nor especially regular, but that is what I wanted.

Freestyle stitching! Image: Karen Costello-McFeat

And as for the over-stitching, I wanted to break up the squares and rectangles with a more organic design and this is what I went with: a sort of double helix in pastel shades of embroidery threads.

Quilting in the past was all about making use of old and outgrown clothing. I am pleased to continue in that tradition. Alas, no sooner had I finished this project than my husband asked me what I was going to do next. The options are endless: bunting, bottle bags, glass cases – indeed anything that doesn’t require a large swathe of cloth. But I don’t think I’ll tell him until he gives me a new shirt!

See you in a few weeks and enjoy the unfolding spring.

Reimagining the Birthday Card

This year, I was blessed with an abundance of beautiful cards: some painted or drawn; others hand made or coloured and more still that were delightful commercial ones. All were thoughtful and reflected the things I love. I kept them up for as long as was respectable (two weeks), admired them once more as I took them down and reread the messages, but still was sad to throw away such pleasing miniature art works.

From card to coaster

Which was when I got my brain in gear to think of how I could reuse them in some practical way. If I could work out some use for them, I could continue to enjoy them throughout the year. Wiping down my rather old and tatty drinks coasters gave me the first bolt of inspiration. What if I could cut out the required shapes, glue them onto the old card and make new coasters. Would that work? It was worth a try. After all, the joy of working with paper is that if it fails, it simply goes into the recycling bin and nothing but your time is lost.

An assortment of cards Image: Karen Costello-McFeat

I made my first selection on the basis of beauty, colour coordination and image size. A coaster with Happy Birthday scrolled across it was unlikely to look very professional! One, a print of an artist friend’s work, didn’t quite work for the coaster size, so I selected another, joyful and quirky one.

If there were any skill involved in all of this, it only lay in selecting the right part of the card to cut and use on the mat. With a little twiddling, it was quite easy and if you were really intelligent (unlike me who has only just thought of it) you could cut out a tracing paper template so that you would know exactly what the image would look like rather then just eye-balling it.

From card to coaster Image: Karen Costello-McFeat

The mats were placed face down on the back of the cards and I used a scalpel to cut out the squares as close to the mats as possible. I used a regular glue to attach them and a bone folder to ensure that they were absolutely flat. All that was needed next was several coats of good craft varnish and voila! New mats and happy reminders of my friends. They are surprisingly sturdy and now my husband is suggesting I redo the place mats. I’m thinking book covers might be fun…

The reimagined birthday card

Since a lovely friend’s birthday was coming up, I also needed to make a card for her. Could I recycle a card I had received in an imaginative way? One of my birthday gifts had been a fantastic paper cutting book and that gave me an idea. Using a very pretty floral card, I could make a backdrop for my paper butterflies. By layering the elements, it would give a 3D effect and I am rather partial to 3D.

Having carefully cut out the base of the card for the floral scene, I used chalk to colour the background, glued on the base and decorated with butterflies. For a June birthday, it seemed the perfect format for my greeting. ‘May your day be filled with sunshine and butterflies, friendship and flowers.’

Flowers and butterflies Image: Karen Costello-McFeat

It is far from perfect, of course, but I hope my friend will forgive its failings and enjoy the sentiment behind it.

Birthday wishes to bookmarks

My husband is a terror with bookmarks. I sometimes wonder if he eats them. No sooner have I given him one for the book we are reading than it is gone, only to be replaced with a blade of grass or an old receipt. My cards gave me the opportunity to fix that problem. I would make a plethora of pretty bookmarks, leave them in a pile on the coffee table and never again would we have to search for the page we left off.

Aesthetics are all, so rather than just cutting strips of card and leaving it at that, I used my corner cutter to give them a more finished look and added complementary coloured ribbons (recycled of course!) to add a little flair. It took only minutes, but gave the results I was hoping for. This tiny project is a great way to use any greeting card and makes a pretty touch to a book you are giving as a gift. If you are able to coordinate the bookmark with the book – even better. Just make a pile of them!

Book embellishments Image: Karen Costello-McFeat

The equipment needed for this project is again very simple. I use a scalpel and cutting mat, but if you have a steady hand, scissors will do fine. Again, I used my corner cutter to neaten the edges and took my bookmarks from the margin of the card and recycled the birthday wishes part. If you don’t have a single hole punch, stick your ribbon to the back or leave plain.

Passing on greetings

Good things should always be passed on in my view, so I decided that those cards which were suitable in size and design should be made into postcards for little messages. Sometimes, you just don’t have that much to say, so a postcard is the perfect solution.

Bespoke postcards! Image: Karen Costello-McFeat

This idea is slightly modified from one I found in another paper art book. The author there used paperback covers (also good) and I used my cards. Once again, my corner cutter made itself useful. On the plain side, draw a few lines for the address and if you wish write, ‘postcard’ on the perpendicular. Royal Mail will post anything (I once had a friend who posted his girlfriend a banana skin and it got there.) Other countries might be more particular.

Once you begin seeing how to repurpose cards and paper, there really is no end to it. My new paper cutting adventure has just begun and already I am hooked. Other projects are in the pipeline, but for now, I think I’m going outside to enjoy the sunshine and be inspired by nature.